Showing posts with label crafts. Show all posts

Monday, June 20, 2011

New clips!

I'm back! It's been a couple of weeks, but I've finally gotten back around to making some new clips. I have been seeing some really cute ones all over the place using silk flowers. I was super excited to find that our Hobby Lobby has then 50% off this week! Then, I went to get some more clips and they were 50% off, too! Hurray!

Here's how I did it. I covered the alligator clips just like I did in the ribbon tutorial. Then I deconstructed some flowers... these are the ones I used


I pulled a flower off of the stem and took it's guts out


I busted out my trusty hot glue gun and glued each layer of the flower in the center. Then I took a jewel (left over from the girls' b-day party) and glued it in the middle.

Here's how they turned out
Set 1


Set 2


Here is my beautiful younger daughter modeling today's clip


It took all of 10 minutes to make 2 clips. I think they're pretty cute!


PS: Anybody need any flower guts for anything? ;-)

Saturday, June 4, 2011

Alligator clip tutorial *Ribbon*

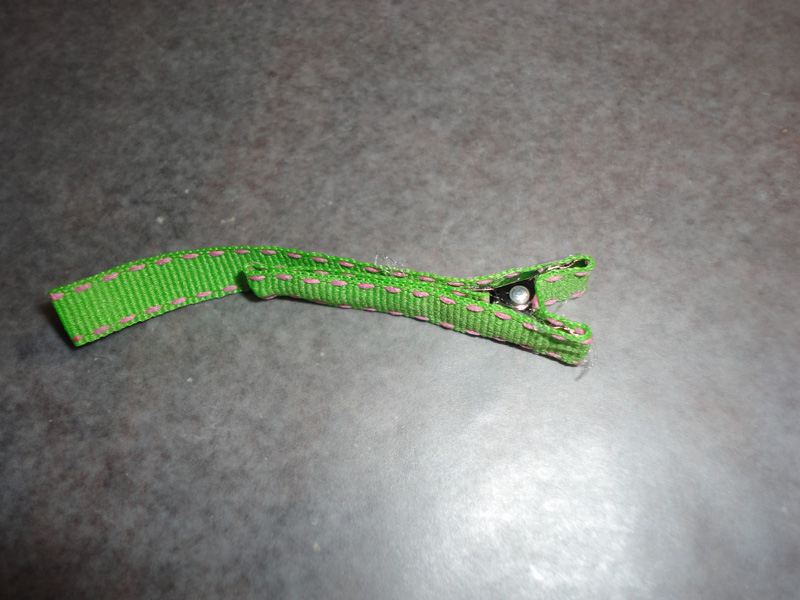
This is the other kind of clips that I like to use on my girls' hair. I've covered them with felt, but found the snap clips easier to cover with felt, and these are really cute when covered in ribbon. I pay about the same amount on these clips at Hobby Lobby. I don't think I mentioned it in the felt clip tutorial, but I find the clips in the bead section with jewelry making stuff. I'm not saying that's where it'll be at your store, but that's where it is here. :-) Anyway, here is what the clip looks like before I mess with it.


I found this ribbon in the dollar section at Target last week. 6 different ribbons, and each will make 2 clips, so 12 clips worth of ribbon for a dollar. Not too shabby.


First, measure your ribbon. You'll need enough to cover all surfaces of your clip... inside, outside, back, outside, and inside again. That may not make sense yet, but just wait. *tip: Once you get one measured and cut, go ahead and cut the rest because measuring it can be a pain*


Now, I've read and heard about using all kinds of things to adhere the ribbon to the clip. Craft glue, double sided tape (scrapbooking tape), and hot glue are a few. I haven't tried the craft glue because it seems to me it would take too long to dry and get pretty messy. I tried double sided tape, but if it's even a little too wide for your ribbon, your clip will be forever sticky. Hot glue can leave strings and if you use too much, wads of glue, but it worked best for me. My trusty glue gun:


Glue the ribbon one section at a time to the clip. If you try to put hot glue down the whole length of ribbon and do it quickly before it cools you will just make a mess. Unless you rock. I don't. One section at a time for me. Start on the inside:


Then the outside


Then glue it to the back side *tip: be sure not to get glue on the spring part. Not good, trust me.*


Glue it to the outside and back on the inside again so that you will have ribbon all the way around like this:


Now, I thought those were pretty cute on their own, but you can add whatever else you want to jazz it up. I found some paper flowers that we used for anther project years ago and stashed in the crawl space under the stairs. I love finding stuff like that. It's like a present from my past self to my present self. Okay, getting a little too "Back to the Future" there. Sorry!

Here are the flowers I found


If you like them, they were in a bag like this


But, like I said, I bought them years ago, so there's no telling if the company is even still in business. :-) On a side note, I also found some feathers. I'm thinking of ideas for those. But I digress. A little hot glue on the flowers and:


These aren't the most durable clips. The flowers are paper, so they bend and I'm sure they'll tear. I'll have to be sure the girls don't take them out and chew on them, but they're cute and even if they're worn only once, it was worth it.
*tip: if you are working with a ribbon with a pattern (like the hearts) and are trying to make two if them just alike, determine which end of the ribbon to start with before you put glue on it. Yeah, I did it twice. You'd think I'd learn*


Anyway, here is my 3 year old, "S", modeling for me.


That's it! Happy crafting!

Basic "Snap Clip" Tutorial

This is a little tutorial for making felt snap clips. Once you've got this basic part down, you can change it and add all kinds of things! So, this is the kind of clip that I start with.


I get them in bags of 20 or so at Hobby Lobby. I've looked at Wal Mart and Michael's, but Hobby Lobby has the best price. I think I pay about $3-4 for the bag of them. I like the three holes on the end, because you can use them to help attach things more securely.

The first thing you do is to trace about 1/4 inch around the clip with a marker that you can see on your felt. Since I'm using a dark felt color, I am using a silver sharpie to mark on it.


Fold your felt so that it is doubled and stick a pin through it so that when you cut you are making two pieces that fit together


Cut out 2 of the same shape using sharp scissors. I bought a new pair just for felt cutting and hide them so that they aren't used for anything else. If your scissors are dull, it's really hard to cut felt. *tip: cut just inside your marked line so that you can't see any of the marker after you cut*


Yeah, so the color changed there. I forgot to take pictures at the beginning of the green clip, so I decided to take some of the brown one to make up for it. :-) Next, lay your clip back on one of the pieces of felt and mark (or eyeball) where this part of the clip is.


Take your sharp scissors and make a small cut where that part is.


The inside part of your clip is going to go through the middle of that cut like this


Match the other piece up on top like this


Next, use a blanket stitch all the way around the two pieces of felt to close it up. It's a pretty easy stitch. If you don't know how to do it, I found a nice video that can help.


When you finish, it should look like this


I've also used a whip stitch to attach them. I like the blanket stitch better because it goes faster and, in my opinion, looks cooler.


*tip: I've used a contrasting colored thread here so that you can see it better. If you're not comfortable with hand sewing, you might want to use a color similar to the felt so the stitches are more hidden.* One more thing, I used two strands of embroidery thread. I would probably use three if I had needles with a bigger eye, but I'm using what I have and trying not to buy much, so two will work.

Anyway, once you've got the basics down, add whatever you like on top! I keep thinking of new things. It's also fun to search online and see what other people have done. I've gotten some great ideas from other bloggers!

If you like this tutorial, check out the alligator clip and ribbon tutorial

Lots of new clips in very little time!

In the last 2 days I have made 14 new clips. It took me about 3 hours all together. Awesome! I love making these, but I love that they take so little time even more.

The first ones are cute little animal clips


The next ones are a different kind of clip and used no felt. Wow! I knocked all of these out in less than an hour - including clean up time.


I took pictures to make a tutorial for these, but the girls are screaming, so I'll have to post it later...

Tuesday, May 31, 2011

Pinterest

My fabulous sister shared a website with me the other day that I have now become addicted to. It's going to help me in crafty things and in other ways. I already got an idea for a toddler lunch that went over well. The website is Pinterest and it's a social networking site that focuses on pictures. You "pin" pictures that you like and can "follow" friends or people with similar styles. These pinned pictures link back to the site where they originally came from, so you can find all kinds of cool websites and tutorials.

For example, I searched for hair clips and found this cute picture

If you click on it (here or on the pinterest site) it takes you to a website that teaches you how to make them. It's almost like bookmarking sites because you can come back to them later if you don't have time to read the whole page.

This is what I made the girls the other day for lunch

This one links to a tumblr page, but how much instruction do you need? My girls loved it!

Anyway, if you need an invitation, let me know. I tried to sign myself up and got a message that there was a waiting list, but when my sister sent me an invitation I was in within an hour.